What You Need:


Open the communication panel. Find an available and safe area.
Fix the device to the din rail using a flat terminal screwdriver.
Connect the RS485 communication terminals from the devices planning to communicate with to the RS485 input pins on the Loggma Data Logger.
Connect the cable ends from the 24V Supply fuse to the 24V input pin on the Loggma Data Logger. Make sure that the fuse is in the open position while wiring.
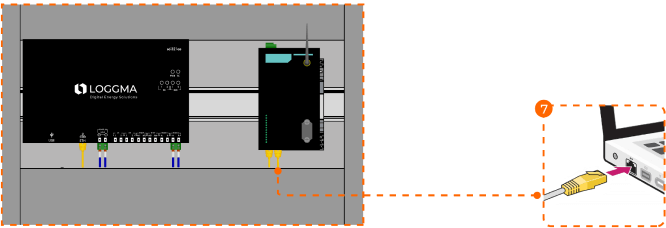
Connect the ethernet cable from the modem to the Loggma Data Logger ethernet port and make sure that the ethernet port lights are on after the data logger starts working.
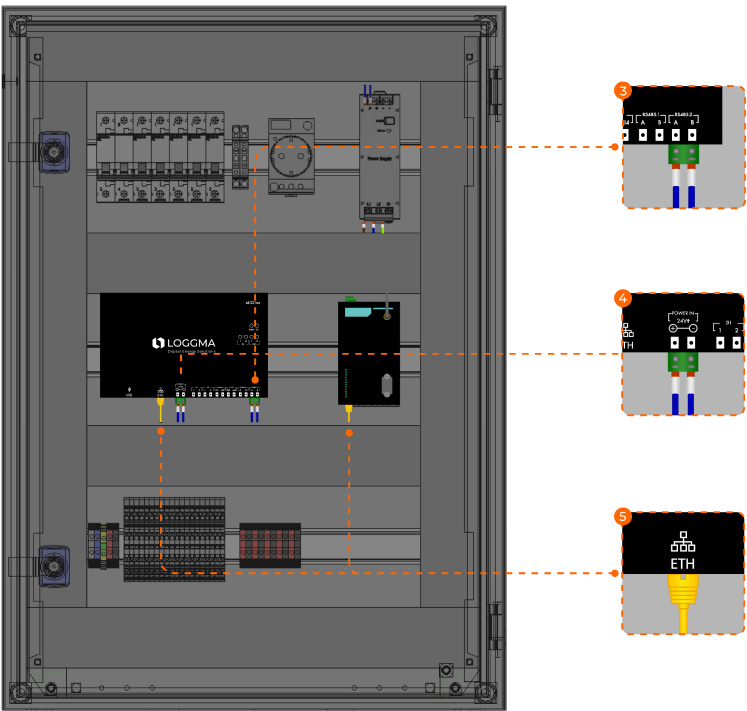
İlişkili Görsel: Step 3, Step 4, Step 5.
Start the Loggma Data Logger by turning the fuse off.
Connect your computer to the modem via ethernet cable to access the device's interface and make adjustments.
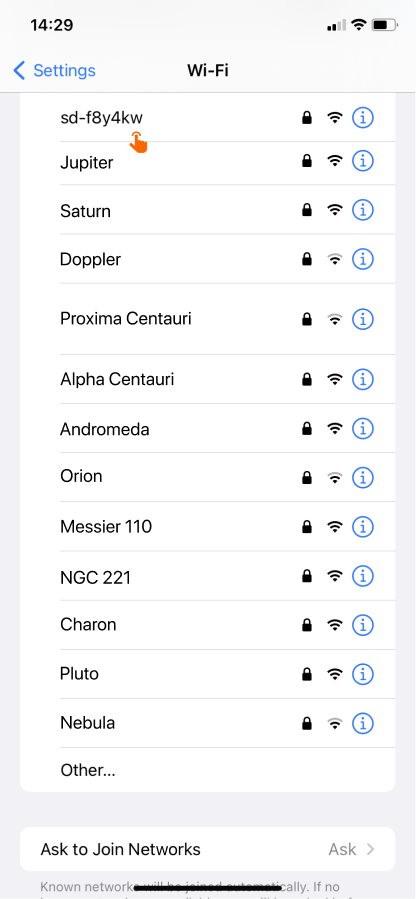
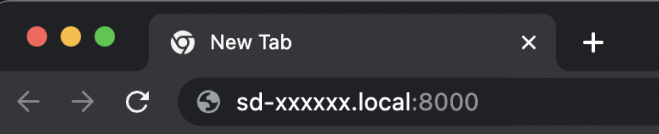
After your computer and Loggma Data Logger are connected to the modem network, in order to access the Loggma Data Logger interface, type the serial number found in the upper right corner of the Loggma Data Logger and add the phrase "local:8000" to the end of the serial number and search for it in the web browser field on your computer. (Example: sd-xxxxxx.local:8000)
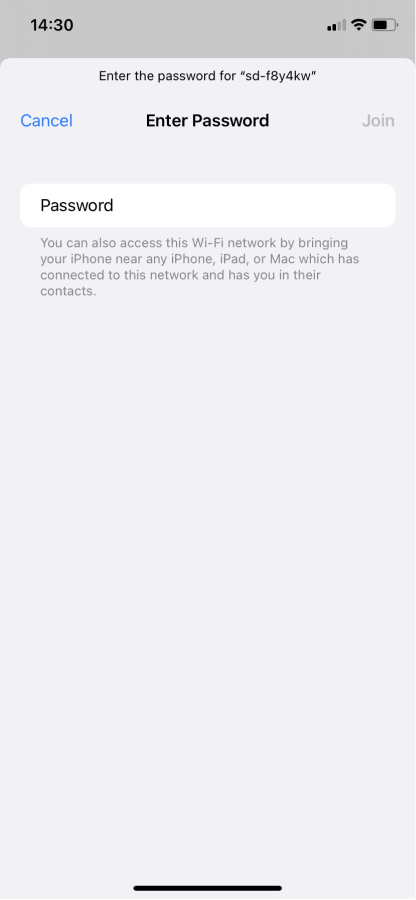
 If you have Loggma Data Logger with Wi-Fi capability
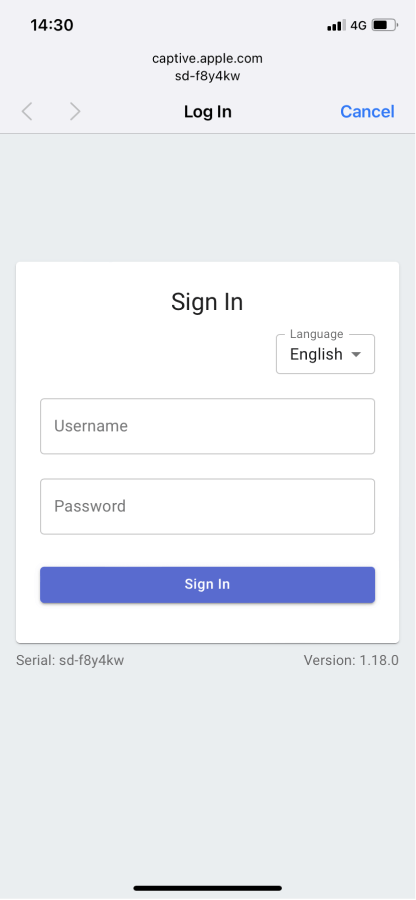
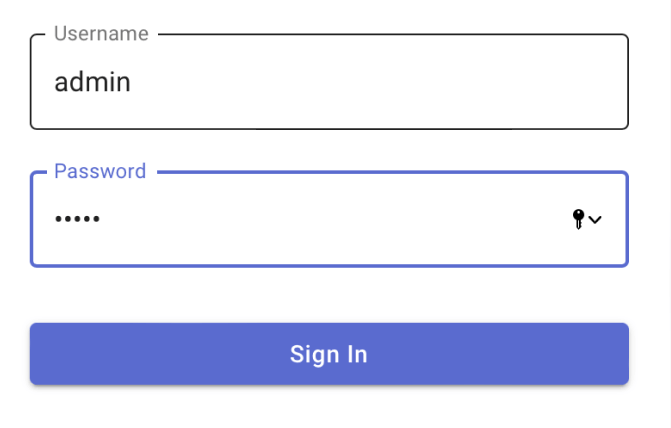
The default username and password of the interface are “admin”. Log in to the interface by filling in the required fields.
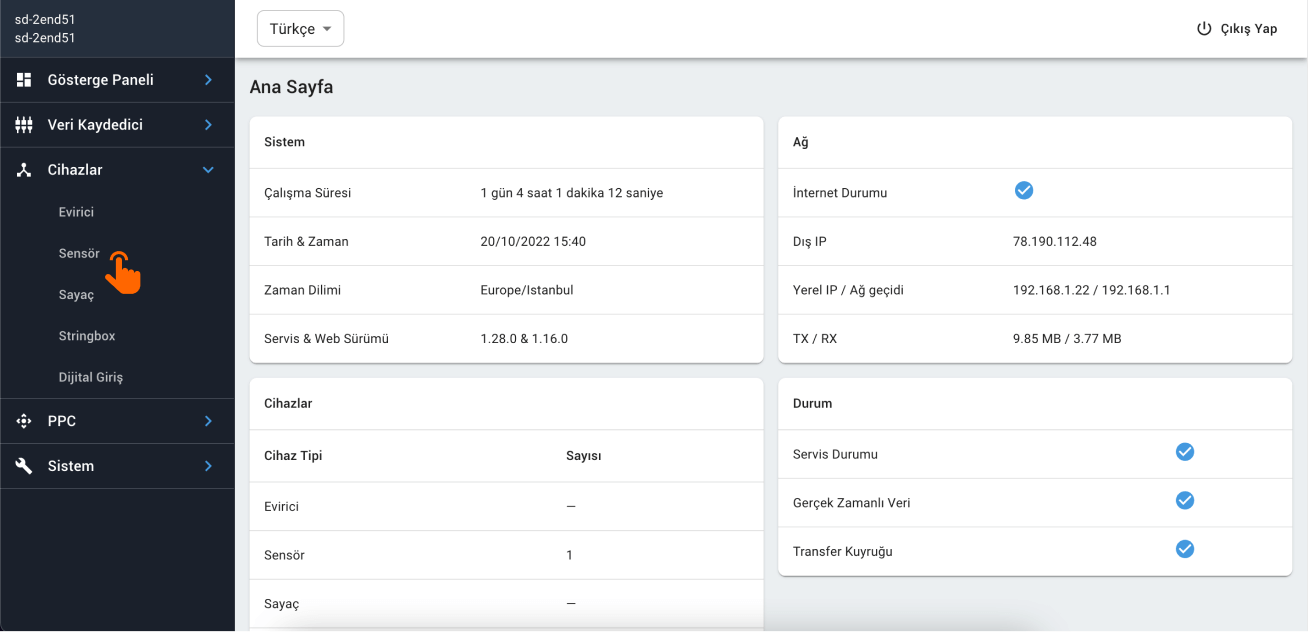
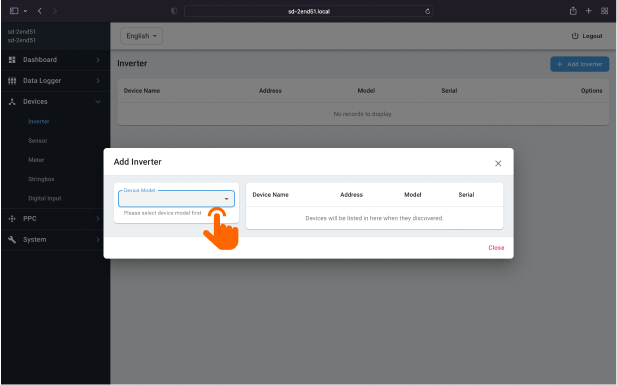
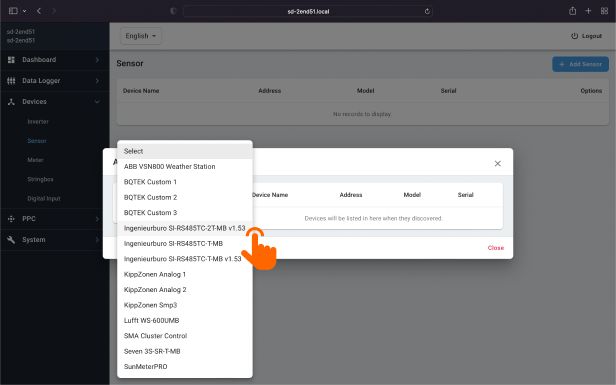
Select the type of device you want to add (E.g. if it is a sensor), the device brand model to be added from "Devices" > "Sensor" > "Add Sensor".
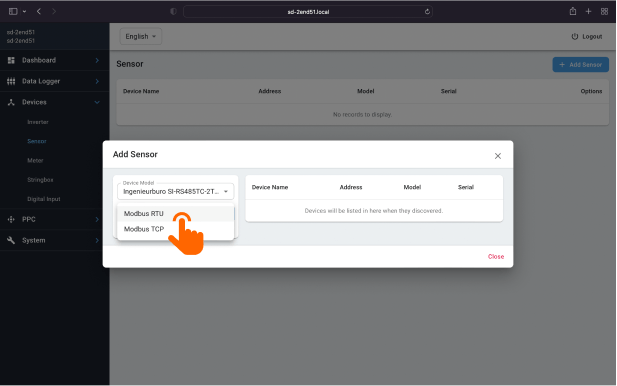
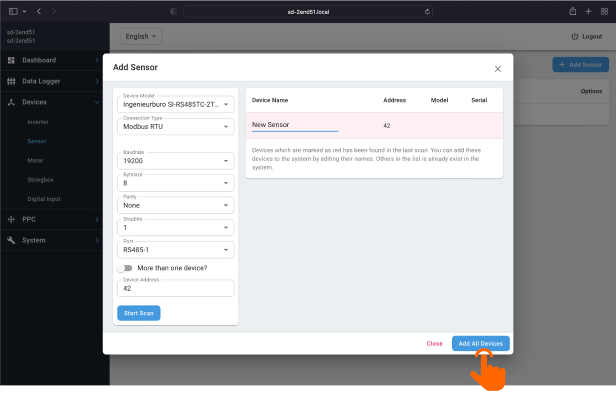
After entering the properties (Baudrate, Bytesize” etc. ) of the device or devices connected to in the specified fields on the screen that opens, press "Start Scan" and find the devices. After the scanned devices are found, clicking "Add Device" will add your device or devices. (Device name can be change if wished.)
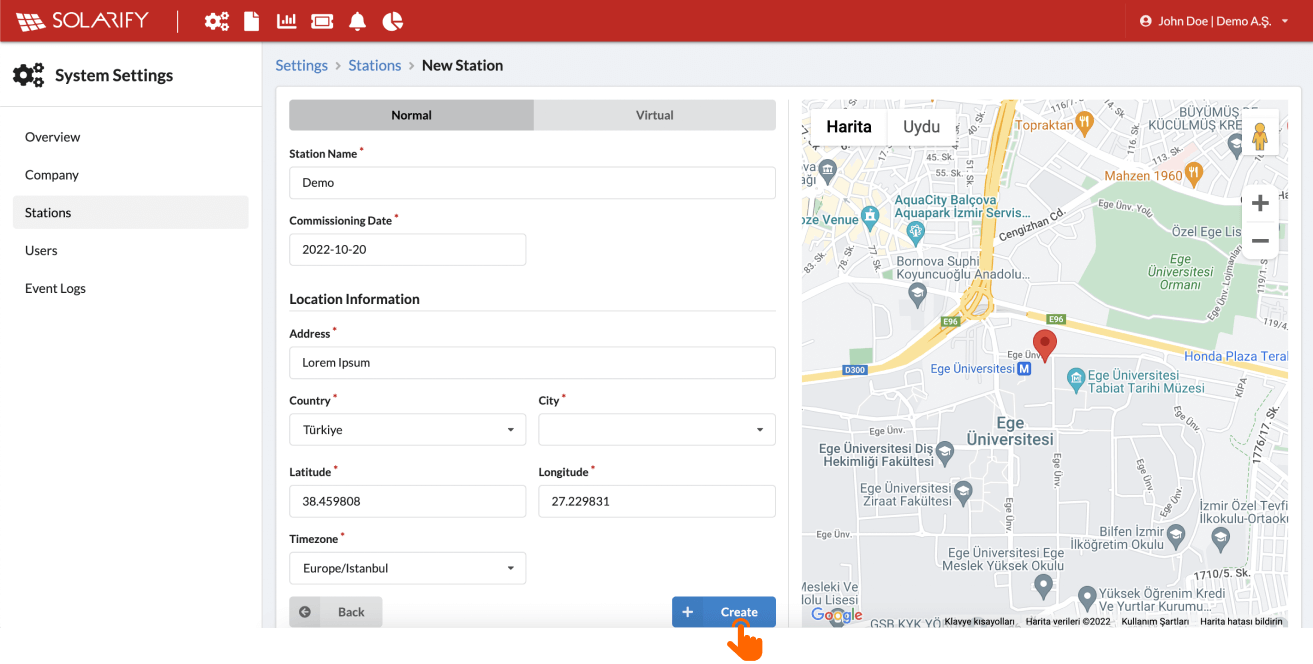
After the device adding processes are completed in the Data Logger interface, log in to Solarify Portal and enter the “Stations” from the "Settings" section and “Create” a new station.


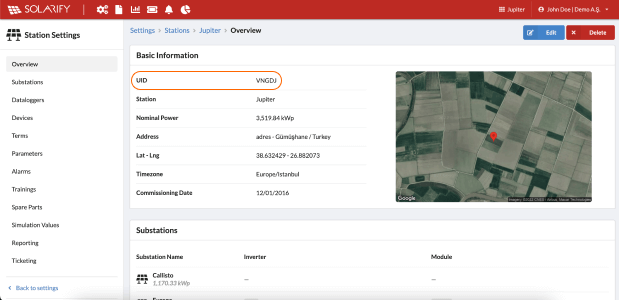
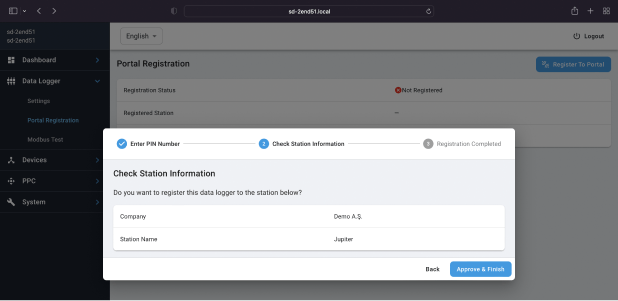
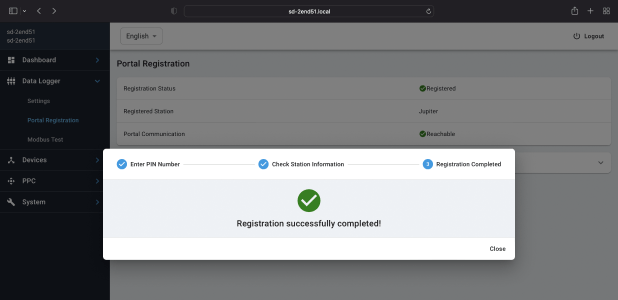
Copy the UID of the newly created station on the “Stations” page and enter the pin code copied into the 5-digit space that will appear on the "Data Logger" > "Portal Registration" page in the Loggma Data Logger interface. Clicking “Confirm and Finish” will add a new Loggma Data Logger to the fields section of the portal. With this process, all the data of the devices connected to the Loggma Data Logger will now be transferred to Solarify Portal.

Halkapınar Mahallesi
1203/11 Sk. No: 5-7 Daire: 139
35170 Konak/İzmir
Erzene Mahallesi, EBİLTEM Binası,
Ege Üniversitesi Kampüsü, Ankara Caddesi,
35100 Bornova/İZMİR
Strangheidgesweg 42,
Alfter, Bonn,
Germany